I wanted an easy, fast manicure to make my nails look a bit better for a party. I chose Essence Miss Universe (that you can see on its own here) and topped it with some glitter by adding Wet n Wild Mermaid Curves from the Fergie collection. The glitter and shimmer made the polish have a wonderful deep sea feeling to it, I really like the result!
Saturday, 12 October 2013
Friday, 11 October 2013
Blog Meets are Surprisingly Fun!
Last Sunday I travelled to Hämeenlinna, a little over a hundred kilometers to the south, to go to a meet organized for Finnish beauty bloggers by Sonia from Tyttö ilman helmikorvakorua. I'd never met any of the other ladies there and was feeling a bit anxious, but everyone was so nice!
The ladies participating were from these blogs: Shiny nail art, Viilankantolupa, Adventures in Sinilandia, Mustaa Kajalia, Meikki monsterin maailma, Sensaisti, One of Beauty's Daughters, Pieni nutturapää, Sinistä pintaa and Pakolliset - tai ainakin melkein.
We had tasty snacks, some sparkling wine and a make-up brush manufacturer and a hairdresser showing off products and teaching us how to use them.
Note to self: don't wear flatforms when walking on cobblestones, it was tricky! ;D The lady from Duroy showed us her favourite products: four different brushes, lash comb and tweezers. The tweezers were killer for applying lash clusters! I liked one of the brushes, the flat top one, and we were lucky to get just that as a gift. I've been trying it out a few times and really like how smoothly it applies my BB-cream. The brush is called Unelma, a dream, and that's what it feels like on skin, so soft!
I really liked spending time with other bloggers, I felt we had a lot in common and there's was this interesting effect that I felt like I kinda knew the people, because I read their blogs. I'm hoping to be able to come to future meets, too, to just sit down and spend the night talking :)
The ladies participating were from these blogs: Shiny nail art, Viilankantolupa, Adventures in Sinilandia, Mustaa Kajalia, Meikki monsterin maailma, Sensaisti, One of Beauty's Daughters, Pieni nutturapää, Sinistä pintaa and Pakolliset - tai ainakin melkein.
We had tasty snacks, some sparkling wine and a make-up brush manufacturer and a hairdresser showing off products and teaching us how to use them.
| A snap from the castle park. |
| We went for a walk to see the Hämeen linna castle. I've been there years ago, but it always looks impressive. |
| I think I need those tweezers, too. |
I had purchased my return ticket in advance, so just when I was about to leave, the hairdresser arrived. He quickly chose a few products for me and the other ladies who were leaving at the same time, and so far I think he got it just right. I got a shampoo and a conditioner by Fudge that have smoothing properties, Tigi Glaze Haze that cuts down drying time and protects hair from moisture, and Foxy Curls by Tigi that should be good for curling my hair with a curling wand. I can't remember the last time I've been so excited to try a new shampoo ;D But these two leave my hair very soft and easy to manage, and the Glaze Haze seemed to make it smoother and dry it little bit faster. I haven't tried Foxy Curls yet.
And then there were the goodie bags with lots of nice products!
| (I did forget the Duroy brush and a Leighton Denny hand cream from the picture) |
| Clarins day cream and a gel face wash, elf lip gloss and a few Youngblood mineral make-up samples. |
| Fudge Smooth Shot shampoo and conditioner, and the tiny cardboard box hosts a Crazystick solid perfume. |
| The Foxy Curls bottle is so pretty, just my shade of purple! |
Tunnisteet:
Traveling
Monday, 7 October 2013
A Few More Wedding Pictures
The last wedding we went to had a professional photographer taking portrait pictures of all the guests, here are the results! You can see more of her work at her own blog, LizzieChili.
![]() |
| Me and my other half, with almost matching Lip Service ;P |
![]() |
| And they claim bassists don't get any ladies! Me, Teemu and Sari. |
Tunnisteet:
Photoshoot
Saturday, 5 October 2013
How to Press Loose Blush or Eyeshadow
I like blushes and have acquired quite a few loose indie ones, but I've noticed they are a bit tricky to use when in rush. Usually if I have time I'll use something like a plate as a palette and swipe the blush brush on it after picking up some product from the container. This would mean having lots of dirty plates, and an extra step compared to pressed blush. To give my indie blushes more use, I decided to try and press a few to see if it would make using them easier. Here's a how-to, it can also be used for pressing loose eyeshadow! Just be careful with the pressing medium then, I use disinfectant but for eyeshadows that actually are close to your delicate eyes you might want to go with pure alcohol.
You need:
Blush (two tea spoons or the contents of a ten gram jar fit into a 1½ inch/4 cm pan)
An empty pan (I bought a palette with six pans from eBay)
Small make-up spatula
A spoon
A plate
Paper towels
Alcohol (or something that's mostly alcohol, like the disinfectant I used)
Scissors (only if your blushes have sifters)
You should also cover the surface you work on, I spent ages scrubbing the stubborn blush from the window sill ;D
5. Put the paste on to the pan
| My palette with four blushes (well, three blushes and one highlighter) already pressed. |
Blush (two tea spoons or the contents of a ten gram jar fit into a 1½ inch/4 cm pan)
An empty pan (I bought a palette with six pans from eBay)
Small make-up spatula
A spoon
A plate
Paper towels
Alcohol (or something that's mostly alcohol, like the disinfectant I used)
Scissors (only if your blushes have sifters)
You should also cover the surface you work on, I spent ages scrubbing the stubborn blush from the window sill ;D
1. Open your blush
If your blush has a sifter, like many do, take your scissors and gently press the edge of a blade under the sifter's edge and nudge it upwards. Work slow so you don't spill the blush.
2. Pour the blush on the plate
Have a clean, smooth surface to mix the alcohol and blush on. I opted for a plate because it's also easy to clean afterwards. Pour your blush in the center. Try to tip the container over on the plate to avoid the blush scattering into all directions.
How much can you fit on a pan? My blush is from a full 10 gram container and fits in one 1½ inch pan (approx. 4 cm). That means roughly two tea spoons of blush for one pan.
3. Add alcohol to your blush
Add a few drops of alcohol (or disinfectant) into the pile of blush. Only a few drops are enough, you can always add more later.
4. Mix well
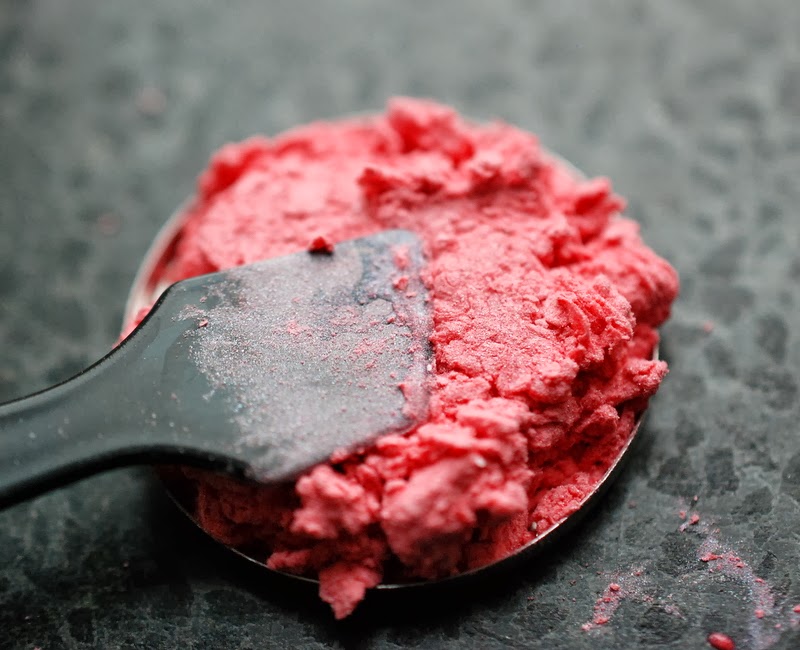
Mix the alcohol and blush. Some blushes seem to repel alcohol and don't blend easily (I think it might be zinc oxide that does it but I'm not sure), but keep at it. These hard to mix ones will look dry even when mixed, but when you can see that there's no loose blush poofing around any more, then the paste is ready. For example the Elf mineral blush was very easy to mix and looked visibly like a paste, but not all do. You can add alcohol if you feel the paste needs it, there's no harm in having a little bit too much, the pressed blush will just take a bit longer to dry. Very wet paste might result in more pigment getting stuck to the paper towel when you press it, but I felt the loss was bearable.
| I like to use a spoon, but you should try the make-up spatula too if the spoon feels too big. |
The spatula or some other flat tool is the easiest for moving the paste from your mixing palette to the pan. I used the spoon to help get the paste on to the spatula. Don't worry if your pan has a heap of paste, it will be all pressed down. Gently press the paste down if the pile gets so high it's hard to add any more. Your goal is to get all the paste on the pan so you can press it firmly in the next step.
6. Press that blush!
Grab your paper towel and fold it over a few times. You want it to still cover the whole pan easily. I made a cardboard circle that fits the pan to help with pressing, but I felt it didn't do anything. If you have something hard you can use, that might even do something. Put the paper towel over the pan, fit you palm over it and press hard. Don't worry if you can feel the towel getting damp, it's just the alcohol coming out. How much sticks to the towel depends on how wet your paste was.
7. Let dry for a few hours
| A pile of paste |
| Then gently padded down. |
| This is how the pan should look before pressing. |
Grab your paper towel and fold it over a few times. You want it to still cover the whole pan easily. I made a cardboard circle that fits the pan to help with pressing, but I felt it didn't do anything. If you have something hard you can use, that might even do something. Put the paper towel over the pan, fit you palm over it and press hard. Don't worry if you can feel the towel getting damp, it's just the alcohol coming out. How much sticks to the towel depends on how wet your paste was.
| My paste was quite wet, that's why there's a lot of pigment on the paper. Dry paste leaves less and means you lose less product. |
| This much residue means the blush is pressed enough and gives out no more alcohol. |
The blush is now pressed but the surface feels cold to the touch, meaning it's still a bit wet. Mine took around 4 hours to dry, but to be on the safe side you should leave the pans to dry overnight. For blush it's not critical, but if you are pressing eyeshadow I'f recommend long drying time to make sure you don't get any pressing medium in your eyes. After the product feels dry to touch, it's ready to use.
Since I used no binder, the pressed blushes are quite soft. It seems to differ a bit from blush to blush, some are very soft and other a bit harder, so have a trial run to test how they perform. A palette with a sturdy lid is a good way to store your new pressed blushes.
| Finished! |
| A close-up on the just pressed Evil Shades China Doll. You can see how full the pan is even when I lost some product while pressing. |
Friday, 4 October 2013
We Are Not Here To Please You Podcast is Live!
Remember back when I took some silly pics of guys? And promised to notify when their podcast was available? The first two episodes are now live and more is coming soon, so head over to the We Are Not Here To Please You soundcloud and have a try!
![]() |
| And look how nice the finished pic turned out :) |
Thursday, 3 October 2013
Guess what?
Last Halloween my other half and I bought an apartment together. This one is going to be different. The dress is lovely, it's made from an off-white sateen and embroidered richly with bone coloured sequins and white beads. There's even detailed, beaded lace at the mermaid hem. The veil has tiny pearls on the top layer and is very full, I think it matches the dress perfectly! I happened to already have some sophisticated white pearls, both as a necklace and a bracelet to go with the dress. The perfect dress to finally tie the knot with the man of my dreams...
Just kidding! This Halloween we are not apartment shopping, but going to dress up fancy for a costume party! This is my dress for the Bella Morte and Underworld Samhain party, before I pour tons of fake blood all over it ;D I found it at a thrift store in the summer and bought it because I already knew the Samhain party was going to happen. The previous owner must have been a beauty queen, the dress is snug on my behind but there was room for another set of boobs at the top ;) I took it in at the side seams a bit so now it fits nicely. The shoulder pads are HUGE, but I guess I'll be a zombie bride who died in the 80's :D
I just couldn't resist taking some shots with it before I paint it with acrylics for a bloody effect and shred the veil. So far I've only spent around 30 euros on the project, I'm happy I found the dress so early and it fit me well enough!
Tuesday, 1 October 2013
Wet n Wild Nail Color in Gray's Anatomy
This is one of the polishes I got from the flea market. It's called Gray's Anatomy and it's by Wet n Wild. In the bottle the polish looks really nice, it's green and lavender greyish duo-chrome. On nails it's very thin, I'm wearing something like six coats in the pictures. It also easily keeps brush marks, so it goes on a bit stripy. It does dry quite fast, but I'm way too lazy for polishes that need tons of layers! Otherwise I do like the polish: the colour is unique and very pretty.
Tunnisteet:
Nails
Subscribe to:
Posts (Atom)