
 |
| My palette with four blushes (well, three blushes and one highlighter) already pressed. |

Blush (two tea spoons or the contents of a ten gram jar fit into a 1½ inch/4 cm pan)
An empty pan (I bought a palette with six pans from eBay)
Small make-up spatula
A spoon
A plate
Paper towels
Alcohol (or something that's mostly alcohol, like the disinfectant I used)
Scissors (only if your blushes have sifters)
You should also cover the surface you work on, I spent ages scrubbing the stubborn blush from the window sill ;D

1. Open your blush
If your blush has a sifter, like many do, take your scissors and gently press the edge of a blade under the sifter's edge and nudge it upwards. Work slow so you don't spill the blush.

2. Pour the blush on the plate
Have a clean, smooth surface to mix the alcohol and blush on. I opted for a plate because it's also easy to clean afterwards. Pour your blush in the center. Try to tip the container over on the plate to avoid the blush scattering into all directions.
How much can you fit on a pan? My blush is from a full 10 gram container and fits in one 1½ inch pan (approx. 4 cm). That means roughly two tea spoons of blush for one pan.

3. Add alcohol to your blush
Add a few drops of alcohol (or disinfectant) into the pile of blush. Only a few drops are enough, you can always add more later.

4. Mix well
Mix the alcohol and blush. Some blushes seem to repel alcohol and don't blend easily (I think it might be zinc oxide that does it but I'm not sure), but keep at it. These hard to mix ones will look dry even when mixed, but when you can see that there's no loose blush poofing around any more, then the paste is ready. For example the Elf mineral blush was very easy to mix and looked visibly like a paste, but not all do. You can add alcohol if you feel the paste needs it, there's no harm in having a little bit too much, the pressed blush will just take a bit longer to dry. Very wet paste might result in more pigment getting stuck to the paper towel when you press it, but I felt the loss was bearable.
 |
| I like to use a spoon, but you should try the make-up spatula too if the spoon feels too big. |
The spatula or some other flat tool is the easiest for moving the paste from your mixing palette to the pan. I used the spoon to help get the paste on to the spatula. Don't worry if your pan has a heap of paste, it will be all pressed down. Gently press the paste down if the pile gets so high it's hard to add any more. Your goal is to get all the paste on the pan so you can press it firmly in the next step.

6. Press that blush!
Grab your paper towel and fold it over a few times. You want it to still cover the whole pan easily. I made a cardboard circle that fits the pan to help with pressing, but I felt it didn't do anything. If you have something hard you can use, that might even do something. Put the paper towel over the pan, fit you palm over it and press hard. Don't worry if you can feel the towel getting damp, it's just the alcohol coming out. How much sticks to the towel depends on how wet your paste was.


7. Let dry for a few hours

 |
| A pile of paste |
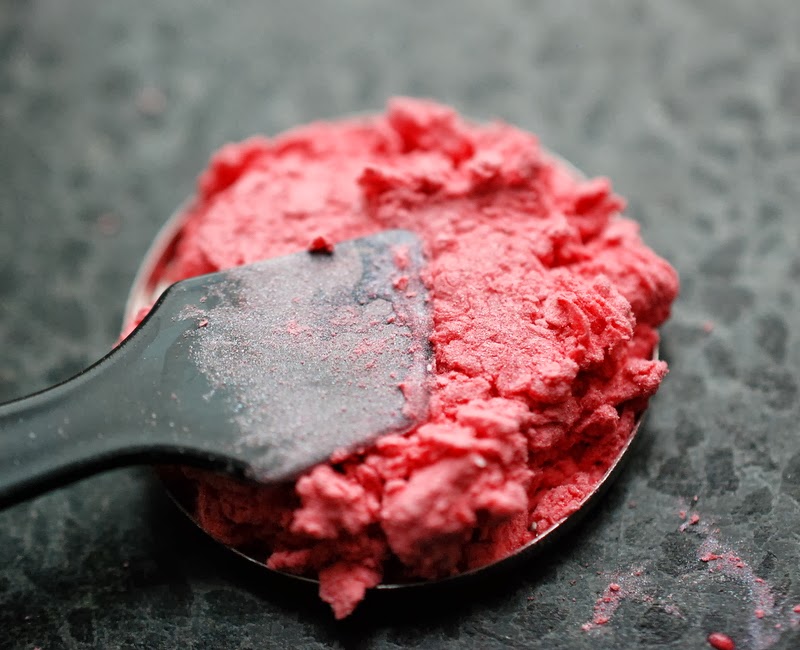 |
| Then gently padded down. |
 |
| This is how the pan should look before pressing. |
Grab your paper towel and fold it over a few times. You want it to still cover the whole pan easily. I made a cardboard circle that fits the pan to help with pressing, but I felt it didn't do anything. If you have something hard you can use, that might even do something. Put the paper towel over the pan, fit you palm over it and press hard. Don't worry if you can feel the towel getting damp, it's just the alcohol coming out. How much sticks to the towel depends on how wet your paste was.


 |
| My paste was quite wet, that's why there's a lot of pigment on the paper. Dry paste leaves less and means you lose less product. |
 |
| This much residue means the blush is pressed enough and gives out no more alcohol. |
The blush is now pressed but the surface feels cold to the touch, meaning it's still a bit wet. Mine took around 4 hours to dry, but to be on the safe side you should leave the pans to dry overnight. For blush it's not critical, but if you are pressing eyeshadow I'f recommend long drying time to make sure you don't get any pressing medium in your eyes. After the product feels dry to touch, it's ready to use.
Since I used no binder, the pressed blushes are quite soft. It seems to differ a bit from blush to blush, some are very soft and other a bit harder, so have a trial run to test how they perform. A palette with a sturdy lid is a good way to store your new pressed blushes.
 |
| Finished! |
 |
| My palette. From top left: Evil Shades blush in Gossamer, Elf mineral blush in Joy, Evil Shades blush in China Doll, Lost in Makeup Land blush in Say it aint so, Lost in Makeup Land highlighter in Faerie (it's a tiny sample, I just wanted to see if it shatters immediately. So far it's doing fine after two uses.) and Moi Minerals blush in Rosewood. China Doll and Rosewood are still wet and thus look a bit darker than they actually are. |
 |
| A close-up on the just pressed Evil Shades China Doll. You can see how full the pan is even when I lost some product while pressing. |

Great step by step, the pictures are very helpful. I will definitely give this a try!
ReplyDeleteThanks, I'm glad you found it helpful! Let me know how your blushes turn out :)
DeleteOh! thanks for an excellent tutorial! I've been thinking of mixing my own eyshadows and this will help a lot because I don't like to use loose powder (bit clumsy). What kind of binder would you suggest?
ReplyDeleteI haven't experimented much with binder, the blushes seem hard enough with only a disinfectant, but I know some people use glycerin. I had a bottle of mixing medium that was mostly glycerin and added a few drops of that to one of the blushes, but maybe it was too little since it didn't make a difference. You could try pressing one eyeshadow with just alcohol and see how it turns out, if it isn't to your liking, you can break it to powder again and try to press it with glycerin. After you use a binder you can re-press broken shadows, but you shouldn't add more binder to avoid the pressed shadow going too hard to give off colour.
DeleteI use a little rubbing alcohol and a pressing binder by TKB trading. Broken eye shadows work well with just alcohol in my experiences and loose indie shadows need both. Detrivore eye shadows press very well and smooth. I only press the shadows that I get in those little sample baggies because I am not so neat with loose shadow. You should check out LostSouls on etsy...I got me a magnetic pallet in a spider web print for my indie pressed shadows.
ReplyDeleteThanks for the tips, LostSouls sounds just like my type of palettes!
DeleteI've always wondered about loose blushes... I'm guessing since you've pressed them, they're not as ideal? What is your opinion on them?
ReplyDeleteI found the loose blushes a bit fiddly, since I want to apply blush with a large brush and they come in small jars. I had to use something as a palette to get a little bit of product out, then swish it with my huge brush on the palette to distribute evenly and only then I could apply it. With the pressed ones I just gently swipe on the blush and apply it immediately. Less steps and less dirty dishes. The blush shades and consistency on skin are to my liking, I was just too lazy to have fresh palettes around all the time.
DeleteHey there! I just found this! :) Thanks for the helpful post, there are lots of tutorials about pressing eyeshadows but not blushes!
ReplyDeleteDo matte blushes come out ok? Pressing matte eyeshadows is a nightmare. I'm also curious about the lack of binder, but I guess nothing shattered? :)