
The stool was originally rescued from the garbage when we moved to this apartment, one of the neighbours had thrown it away, and I just needed something to stand on to get stuff on shelves and lamps on the ceiling. It had a reddish fake leather cover that had some tears in it. The stool was still sturdy, so I thought I could make use of it and padded it with some spare filling from an old pillow and put pink leopard fabric on it.
The leopard fabric was a bit too loud for the hallway, so I dug up a piece of black fake fur after dreaming of covering the stool with lamb skin. The fake fur will do nicely ;)
You need:
A stool
Enough fabric to cover it
Staple gun and staples
A screwdriver
A cat (optional)
1. Inspect the Stool
So get your stool out and take a look at how it's put together. Mine has a separate top and four legs that are screwed on. If yours has a more difficult structure, you can leave the legs on and don't need a screwdriver at all.
 |
| Before. A lovely pink leopard print with a glued on ribbon that's coming off. |
2. The Fabric
If you have enough fabric to cover the seat, just cut out a piece with about 5-10cm of extra so you have room to work the fabric under the seat. I didn't have enough, so I sewed two pieces of fake fur together. If you choose a fur fabric, prepare for a mess! The hair sheds from cut edges.
4. Stapling the Fabric on
 |
| I had two pieces to sew together. And a resin cat skull and an empty tea cup. |
 |
| This picture is trying to show how you can get the pile out of the seam by gently scratching it with your nails. That way you won't have a visible seam in the middle. |
3. Take of the Legs
Lay your stool upside down on the floor. Screw off the legs and make sure you don't lose the screws. You can use a regular screwdriver, I just had to use the fancy drill that I bought from last summer's sales, it one of my favourite tools, so easy and powerful!
You could take off the old fabric at this point, if you want to, but it will all be covered so it's okay to leave it on. My fabric was intact, so I didn't bother.
 |
| Legs are taken off. |
4. Stapling the Fabric on
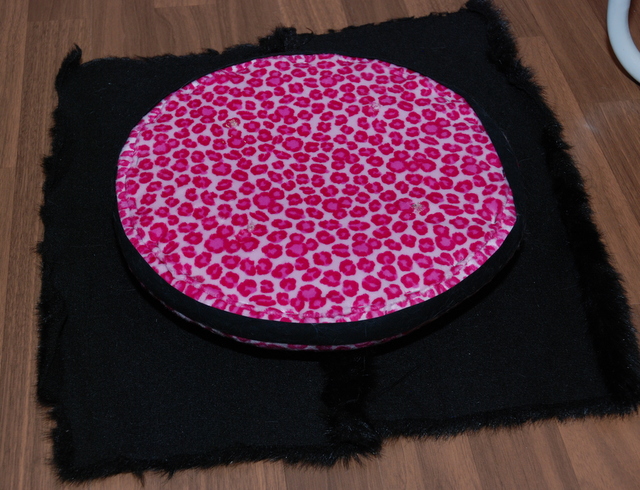 |
| Lay your fabric on the floor with the right side down and put your seat part on top. |
 |
| Cut off the corners, it's easier to work with the fabric when there's not too much of it. |
Make sure to take note where the old screw holes are, so you won't accidentally put staples on them. You can screw the legs on in a different position, but it's easy to use the old holes.
 |
| Start by stapling two opposite sides with one staple. Hold the fabric tight. Make sure you push hard on the seat when you staple, if you use fur or some other thick fabric, so the staple will reach the wood part and stay on. |
 |
| Continue with the next edges, put only one staple on each side. |
 |
| Continue adding staples always in the middle of the loose section, so the fabric will be gathered evenly. |
 |
| This is how it should look like with all the fabric fastened! Fur is a forgiving material, no one will see my folds amidst all the hair. There's about 1-1,5 cm between the staples, but you can put on as many as needed to make the fabric stay on nicely. |
5. Put the Legs back on
Here's the stool after. I want contemplating painting the legs black, but I was afraid the paint would not stick to the plastic feet (or would rather stick to the floor) so I made do with white legs. You can still see the seam running in the middle, but it will vanish with use. Fake fur isn't the most durable of materials, but it looks cool and I'm not expecting lots of people to be sitting at our hallway any time soon, so I think it will hold on just fine. Most likely it will be used like below:
 |
| Put the legs back on. If the old screw holes are visible, just put the legs in the same position they were. If you need to make new holes, just make sure the legs don't go on crooked. |
 |
| Finished! |
Here's the stool after. I want contemplating painting the legs black, but I was afraid the paint would not stick to the plastic feet (or would rather stick to the floor) so I made do with white legs. You can still see the seam running in the middle, but it will vanish with use. Fake fur isn't the most durable of materials, but it looks cool and I'm not expecting lots of people to be sitting at our hallway any time soon, so I think it will hold on just fine. Most likely it will be used like below:
 |
| A satisfied stool user. Möttönen the cat has been sitting on it for hours. |
Omg your cat is gorgeous.
ReplyDeleteThanks! Möttönen is a pretty little thing, although she is on her way to hugeness since she was sterilized. Her favourite hobby is to eat all the catfood and leave nothing for other kitties ;P
Deletehaha omg i LOVE your cat! thanks for sharing the tutorial aswell : ) inspiring!
ReplyDeletelove your blogheader :D
Thank you so much!
Delete